Step By Step Instructions
- Log into Facebook
- Use the Facebook account linked to the page you manage.
- Access Your Page
- Click the See More button on the left menu.
- Scroll down and click on Pages.
- Select the page you want to manage leads for.
- Switch to Page Mode
- On the left side, click Switch into the Page.
- Confirm by clicking the Switch button in the new window.
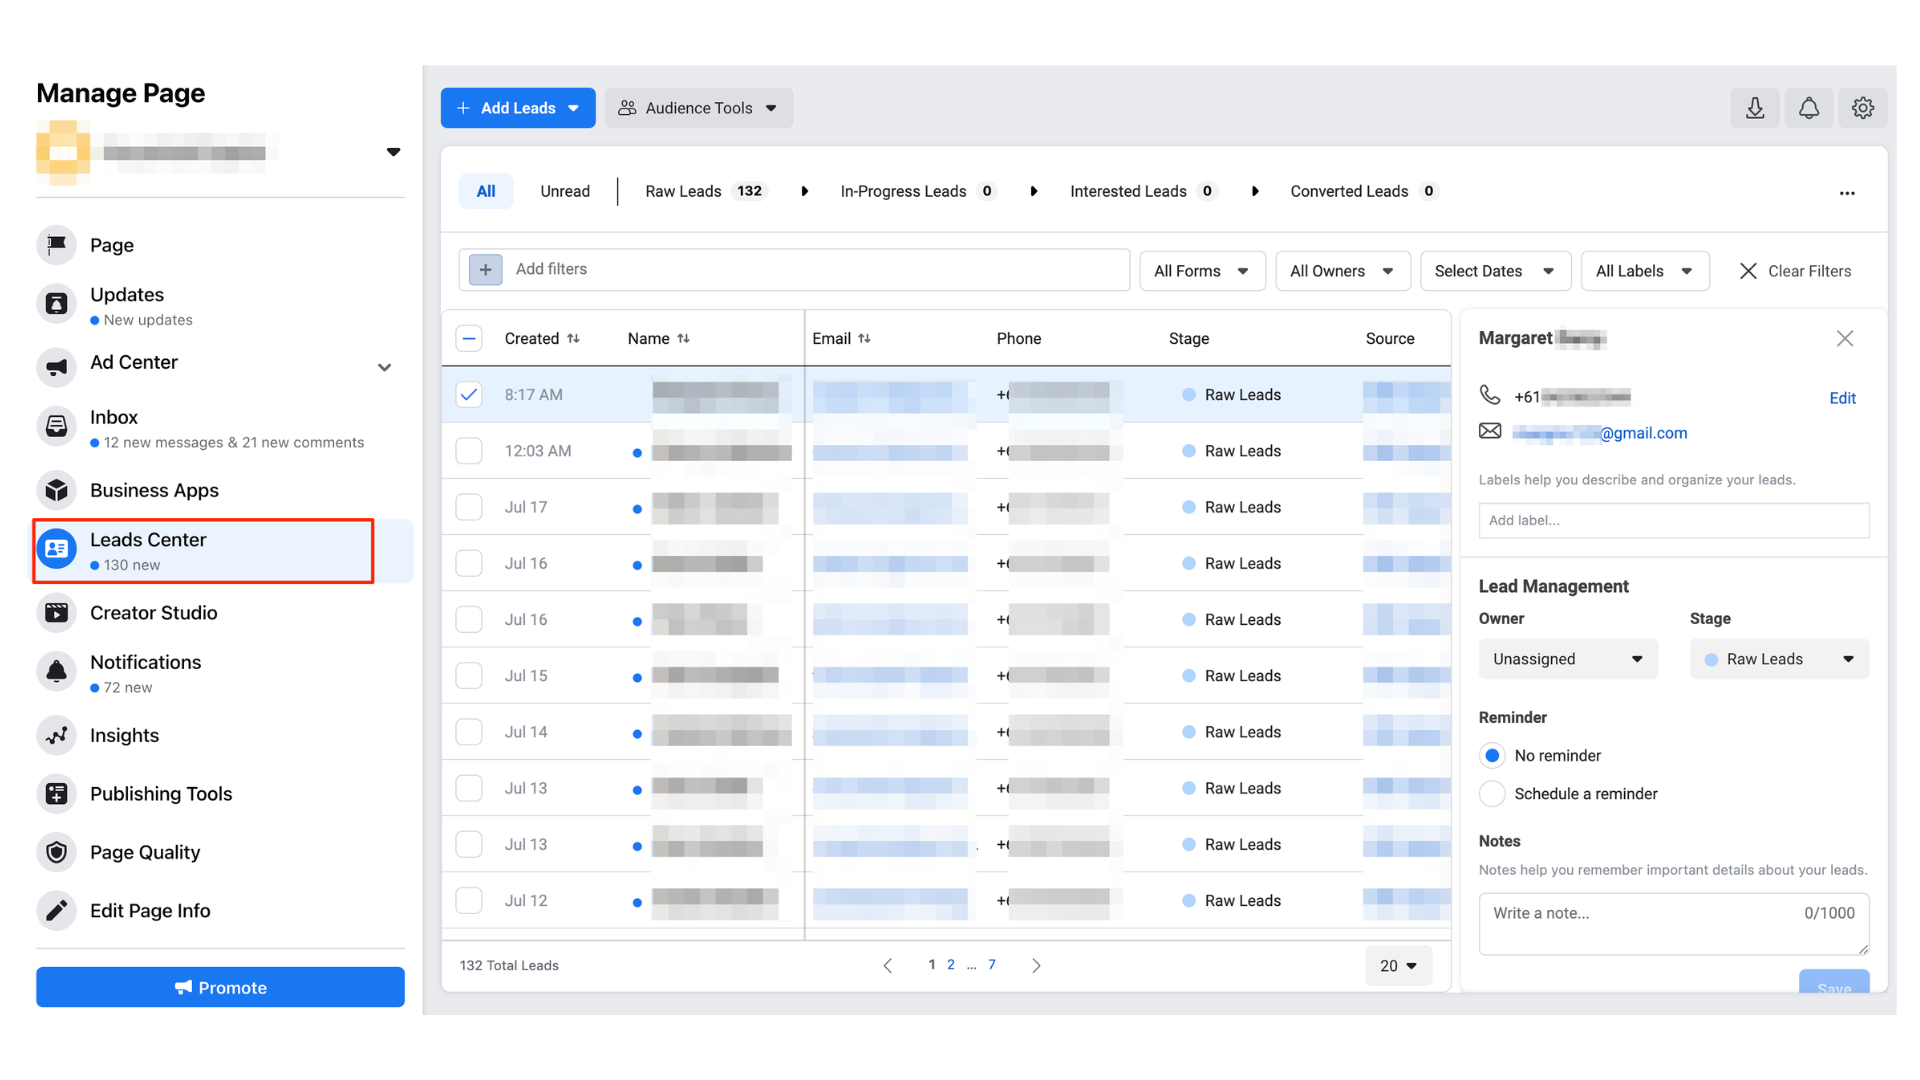
- Find the Lead Center
- In the left menu, click on More Tools.
- If you don’t see the Lead Center, click the down arrow next to More Tools.
- Click on Lead Center.
- View and Manage Leads
- In the Lead Center, you’ll see a list of leads.
- Click a lead to see their contact information.
- You can add labels, change stages, assign leads to team members, and take notes.
- Organize Leads
- Go to Settings to add, change, or reorganize stages.
- Click and drag leads from one stage to another.
- You can switch between pipeline view and table view by clicking the view options in the top left.
Managing Leads on Mobile
- Download the Facebook Business Manager App
- Go to your app store and download the Facebook Business Manager app.
- Open the app and log in with the admin account for the page.
- Access Leads on Mobile
- Tap the top left icon to select the page you want to manage.
- Tap Tools in the lower right.
- Scroll down and tap Lead Center.
- View and Update Leads on Mobile
- Tap a lead to see their information.
- Change stages from the lead’s detail card.
- You can also tap the three dots next to each lead to change their stage.
That’s it! If you have questions, feel free to ask for help. Good luck!